Tuesday, 21 May 2013

Reviewing Sweet Silk Sugarpaste by Sweet Success

Now if you decorate a lot of cakes like I do, you'll be after the perfect sugarpaste to use to both cover the cakes, and model with. And, like me, you've probably used a lot of different types in the quest to find it. I've tried Tesco, Asda, Regalice, Dr Oetker, Bako, Covapaste....and possibly a couple of others too. I was quite happy with the Tesco brand for quite a while, but then they 'improved' the recipe, and like many other decorators I know, I found it much harder to use. So I had settled on Covapaste for a while, and it suited me. But I've had a couple of difficult batches of this recently, so went on the hunt again.

I was sent a free sample of Sweet Silk Sugarpaste from Sweet Success. I'm saying that to be totally honest and up front with you. It was a 1kg free sample, but I am reviewing this giving my own true, honest opinions. I am not being paid to review this product.


It just so happens that the next cake I was making was a birthday cake for my daughter, Grace. Now I gave this sample quite a work out. I gave it a good knead, I coloured it, and I rolled it very thin as the cake was a 8" round, 4" deep one, and I wanted to use the same paste for some of the decorations. I'll be honest with you, it did tear a little bit, and when I tried to colour it, it took longer than the Covapaste to fully take on and evenly distribute the colour. But I felt that I'd probably not treated this in quite the same way as I would have done another batch of paste- ie I rolled it far thinner than I normally would, so I ordered some more and had another go.

And with the next cake I had more success.  In fact, I've tried it on this cake.....


And on this cake.....

 
And on this cake.....

 
And on this cake.....
 
 
And also on this one.....
 

Although on this last one I had a bit of trouble again. You see I'd forgotten the magic trick that I'd tried with the others- warm the paste in the microwave. Just for about a minute on a low heat, but that's just enough to introduce enough warmth to it, that you don't have to knead and knead and knead it to get it pliable, and the warmer paste takes the colour much more easily, it's softer, it rolls better, it covers better. I forgot about this when covering this one, so ended up with some tears and elephant skin (hence the rocks covering the front- sssh don't tell my nephew, this one was for him!)

So the secret to this, for me anyway, seems to be, if you warm it up, it's easier to use. So for now, although I'll still keep an eye on what other brands are doing, I'll be using Sweet Silk Sugarpaste from Sweet Success. You can buy it direct from Sweet Success, and they make it there themselves. And if you are going to be using a lot of it, you can apply for a trade account so you'll get it that bit cheaper too.

Or, you could enter their current competition to win 1kg of the paste to try for yourself. You can enter over on their fb page.  Good luck if you're entering!!

Let me know if you use it too, and what you think about it, I'll be really interested to hear your thoughts.

xx

www.mariesbakehouse.co.uk

www.facebook.com/MariesBakehouse


Tuesday, 19 March 2013

Cake International Manchester 2013 - my experience of entering the competition!

 
Have you been to Cake International? It's been running for many years, but I've been to the Birmingham one for the last three years.  The first one, I drove there from Manchester with my mum, spent a fortune on goodies and came home full of ideas, and totally in awe of anyone who entered the competition, thinking it wasn't anything that I'd ever do myself.

 
The second and third years I went with cake friends and stayed over near the NEC. It was a really social experience, spending time in person with 'real live' cake friends, not just chatting to them over the internet! Each year different friends entered the competition and, with them, I lived through their anguish beforehand whilst making their competition piece, their nerves when waiting for the judges to announce who had been awarded what grades, and their joy and sometimes disappointments at how they had been scored.

 
But I hadn't ever entered the competition myself. Well, I lived in Manchester, and the cake had to be delivered to Birmingham before 8.45am on a Friday morning, and I had work, or had to take the children to school, so I couldn't possibly get it there, could I?

Good enough excuse I thought.

 
Then Cake International moved to Manchester. And not just Manchester- to Event City, which is less than ten minutes away from where I live in Urmston. So the 'I can't get it there' excuse was no longer relevant. Hmmmmmmmm.

 
So, when the time came to think about buying my tickets for CI, it was crunch time.  Was I going to buy a three day pass? Or enter the competition and have a three day pass because of it? So I entered the competition. I read through the rules of each class and decided on Class B: Celebration cake with all edible decoration.


I decided to stick with something I knew I could do. Some people enter CI to really challenge themselves, and hats off to them for doing it. There are some absolutely fantastic pieces there, such as this amazing piece from Rhu at Pimp My Cake By Mama Rhu. But I thought I'd make a cake which I'd make for a customer, and just have fun making a cake I enjoyed. Which is exactly what I did.

 
I like making cakes with lots of detail. Cakes which make you look a little bit closer. Cakes which have decoration at the back as well as at the front. So I kind of went to town with it on this cake.  I didn't stress, I didn't worry, I just enjoyed making a cake that I wanted to make.  So far so good I thought.

 
On the morning of delivery I was still fairly relaxed about the whole thing. Until the point of putting it on the table. Then I started to feel nervous. Lots of people would be looking at my cake over the next three days. The judges would be scrutinising it in a matter of hours. People might wander past it and criticise it. I might be there and hear them! Suddenly I wasn't quite so calm! But I felt confident enough in my cake to think I might be awarded a merit, and if I was lucky enough to get a bronze, then I'd be thrilled.

 
After taking the children to school, and going home to bake for a order, I returned to CI at about 11am. As soon as I arrived I went to the competition area and saw a judge with my cake! Suddenly I felt very sick.  Suddenly it really mattered to me what this person thought of my cake, and I needed to know as soon as possible. 


Then I, and other cake friends, waited for the results to be announced. And waited and waited and waited. Three o'clock came round and I had to leave to collect my children from school. On returning home I was glued to my laptop, waiting for Rhu to let me know what the results were. Then Rhu posted a picture for me.

 
Stunned. Totally stunned. In fact I think my first response was 'Noooooooooooooooooooo!' But completely and utterly pleased and proud. Thrilled that one of my cakes, one I'd make in the same way for a customer, achieved a gold at Cake International!
 
Quick jump to Sunday afternoon, and the award ceremony, and not only did I manage to meet John Whaite (winner of GBBO) who presented my certificate, I was also awarded best in my class. Here's me with a daft grin, and trying not to cry!
 
 
Happy caker :)
 
And just because I have one, here's a picture of Mary Berry with my cake. Well, almost with my cake. I'd like to think she was at least looking at it!
 
 
Would I enter CI again? Yes I think I would. I might even step out of my comfort zone and enter a class I'm not so confident in. I have a few ideas forming.......
 
So that's it, my journey to Cake International Manchester.
 
Any ideas how many eggs the Easter Bunny hid in the garden?? ;0)


Tuesday, 12 March 2013

How to make homemade chocolate pudding and toffee sauce

 
Looks lush doesn't it? Let me tell you.....it is! ;) My other half even said it was the sort of pudding you could serve in a restaurant- high praise indeed!!!
 
So without further ado, let me tell you how to make it for yourself.....
 
For the chocolate pudding (to serve four) you will need:
50g unsalted butter
50g caster sugar
2 eggs
90g SR flour
2 tablespoons cocoa powder
 
What to do:
1. Cream the butter and sugar together, then add the eggs until the mixture is light and fluffy.
2. Sieve the flour into the bowl, add the cocoa powder, and beat in until fully combined.
3. Pour the mixture into 4 buttered bowls or ramekins. 
4. Bake for about 15-20 minutes or until risen.
5. Tip out of the moulds and serve with toffee sauce and vanilla ice cream.
***IMPROVISATION ALERT*** I don't have ramekins, or four suitable bowls to use for this recipe, so I used mugs.  Yes that's right mugs that you'd normally have your cuppa in. Worked a treat. You can grease the inside with butter or, like I did, spray Fry-Lite, or Cake Release into them before adding the raw mixture. The cakes just tipped out when it was time to serve them :)
 
For the toffee sauce you will need:
170g butter
260g soft light brown sugar
2 tablespoons water
1/4 teaspoon salt
180ml evaporated milk
1 teaspoon vanilla extract
 
What to do:
1. Put the butter, sugar, water and salt in a saucepan, over a medium heat and stir until melted and combined.
2. Bring to the boil for 3-5 minutes until the toffee sauce thickens to the desired consistency.
3. Remove from the heat and stir in evaporated milk and vanilla.
 
Easy as that!!
 
So now you've decided that it's easy enough to make, we'll have another picture of it to convince you to make it sooner rather than later....
 
 
Let me know if you make it and what you think of it!


Tuesday, 5 March 2013

How to make Anzac Biscuits

Last week my eldest daughter Grace had to do a talk at school. She had visited The Imperial War Museum North with her Dad and younger sister Alice, whilst I was poorly in bed. So she decided to talk about her visit there. We also talked about what could have been baked during a war and came up with Anzac Biscuits. I'm sure you know about these already, but if you don't....

They are made from butter, golden syrup, water, bicarbonate of soda, oats, coconut, flour and sugar. Anzac biscuits were made by the wives and girlfriends of soldiers to send them in the war, to cheer them up and keep them fighting fit. They do not contain anything which will go off quickly, so were ideal to last the journey to the battlefield.
Anzac Day is celebrated in Australia to mark the first anniversary of the first major military action fought by Australian and New Zealand forces during the first world war.

So we decided to make a batch of them for Grace, and her class mates, the teachers and teaching assistants....and a few left over for us too- we made five batches in the end!! They are yummy, and taste like you are having something healthy with the coconut and oats!!

Here's how to do it.....


The ingredients:
 
85g porridge oats
85g dessicated coconut
100g plain flour
100g caster sugar
100g butter
1 tbsp golden syrup
1 tsp bicarbonate of soda
 
What to do:
 
1. Preheat the oven to 180C/fan 160/gas 4.  Line 2-3 baking sheets.
Put the butter and golden syrup in a saucepan and melt together.
 

2. Whilst that is melting measure the dry ingredients and mix them together in a large bowl.


3. Put the bicarbonate of soda and 2 tbsp boiling water in a cup and mix together quickly, then tip it into the melted butter mixture and stir quickly.  You'll get a lovely bubbly mixture with lots of air incorporated into it.
 
4. Tip the melted butter mixture into the dry ingredients and mix everything together until fully combined (forgot to take a pic of this bit-sorry!)
 

5. Roll the mixture into walnut sized balls and place on a baking tray a few centimetres apart to allow room for spreading. It makes about 20 biscuits. Excuse the paper on this photograph, this was batch number five baking now! Bake in batches for about 8 minutes until golden.  Leave to cool on the tray for a couple of minutes then transfer to a wire wrack to finish cooling.
 

And here they are finished.  Really yummy :)  Crunchy round the edges, chewy in the middle. They'd also be good with some raisins, chopped dates or maybe cherries or ginger added.  I might try that next time.  Have a go and let me know what you think x


www.mariesbakehouse.co.uk


www.facebook.com/MariesBakehouse


Tuesday, 26 February 2013

How to join a Cake Eaters Anonymous group

So what is Cake Eater's Anonymous?


Essentially, it's a group of people who either just like eating cake and baked goods, or like eating AND baking them too, that get together every so often and have a drink and eat cake whilst raising money for charity.  Sounds perfect doesn't it?!


The raising money bit is done through buying tickets to attend the event. If you are a baker you pay £3, if you don't take anything along with you, you pay £5.  Different branches of the CEA have slightly different rules for how much you can take with you, so you need to check with them before you attend. Your ticket entitles you to try three different cakes/cookies/cake pops/biscuits.......(all home baked, no shop bought cakes here), and then if there are any left over, you can take more home to enjoy, for an additional donation. 


The charities which are supported change from month to month, and are largely suggested by those people attending beforehand.


The original CEA was the brainchild of four friends in Nottingham.  Then when other bakers found out about it, the word has spread and other branches are opening.

There are currently branches in the following places:

  • Angus, Dundee and Aberdeen branch - run by Grace: https://www.facebook.com/pages/Cake-Eaters-Anonymous-Angus-Dundee-and-Aberdeen/439894902718195  
  • Cheshire branch - run by Heather at the Cheshire Cake School http://www.cheshirecakeschool.co.uk/cake-eaters-anonymous.php and on her page here https://www.facebook.com/CheshireCakeSchool 
  • Nottingham https://www.facebook.com/cakeclubnotts
  • Oxfordshire branch - https://www.facebook.com/CakeEatersAnonymousOxfordshire
  • Shropshire branch - https://www.facebook.com/marketdraytoncakeclub

  • and the one I run which is in Urmston, Manchester https://www.facebook.com/CakeEatersAnonymousManchester

    If there is not one near you, then why not start one? You can find some more information about starting one up here https://www.facebook.com/notes/cake-eaters-anonymous/find-a-cake-eaters-anonymous-near-you/354558354631566 


    If you live near Manchester we'd love to see you at the next meeting. Check out the fb link above for the latest dates and information.  Or if you set up a new one, let us know and we'll add you to the list!


    www.mariesbakehouse.co.uk

    www.facebook/com/MariesBakehouse


    Wednesday, 20 February 2013

    How to make Aphrodisiac cookies

    Ok, so they're called Aphrodisiac cookies, mainly because they contain walnuts and dark chocolate, both of which have reported aphrodisiac qualities. I can't promise they'll pep up the old love life, but they're a really yummy cookie, so it's worth a try anyway isn't it?!
     
    Ingredients you'll need:
     
    165g softened butter or baking margarine
    2 eggs
    1 tsp vanilla extract
    150g caster sugar
    175g dark brown sugar
    80g porridge oats
    200g plain flour
    1/2 tap baking powder
    1/2 tsp salt
    170g dark chocolate chips
    115g chopped walnuts
     
    What to do:
     
     
    1. Preheat your oven to 170 degrees.  Put the softened butter/baking margarine, the eggs, and the vanilla extract in a bowl. Mix together. You can use an electric whisk if you want to, if you do it'll be far fluffier in appearance than in the next picture....


    2. I used a wooden spoon, so if that's what you use too, it'll look something like this.


    3. Add all the rest of the ingredients. I LOVE recipes where you just pile everything in at once. Don't get me wrong, I can appreciate the art that goes into more carefully added/folded/whisked at each stage etc recipes, but if you pile it all in at once, you have less time to wait before you get to try it, which has got to be a good thing? Yes?


    4. Mix everything in together, until fully combined.


    5. Using a dessert spoon, or whatever you have handy, dollop small amounts onto a lined baking tray.  You should get about 24 cookies out of this recipe.  Make sure you have quite a gap in between each one as they tend to spread......see the next photo.....


    6. You see? Lots of spreading, which resulted in the top ones touching each other. Not a big problem, but remember to space them apart. Leave them on the baking tray for at least 10 minutes to cool down.  They are very fragile and soft as soon as they're out of the oven and will break easily if you try and transfer them to a cooking rack. I know, I tried. If they're still fragile after this time, leave them for a bit longer before you move them onto cooling racks to finish cooling fully.

     
    7. And here they are all cooled and ready for eating. Nomnomnom!
     
    Enjoy!


    Thursday, 14 February 2013

    How to make a paper piping bag

    How To Make A Paper Piping Bag

     
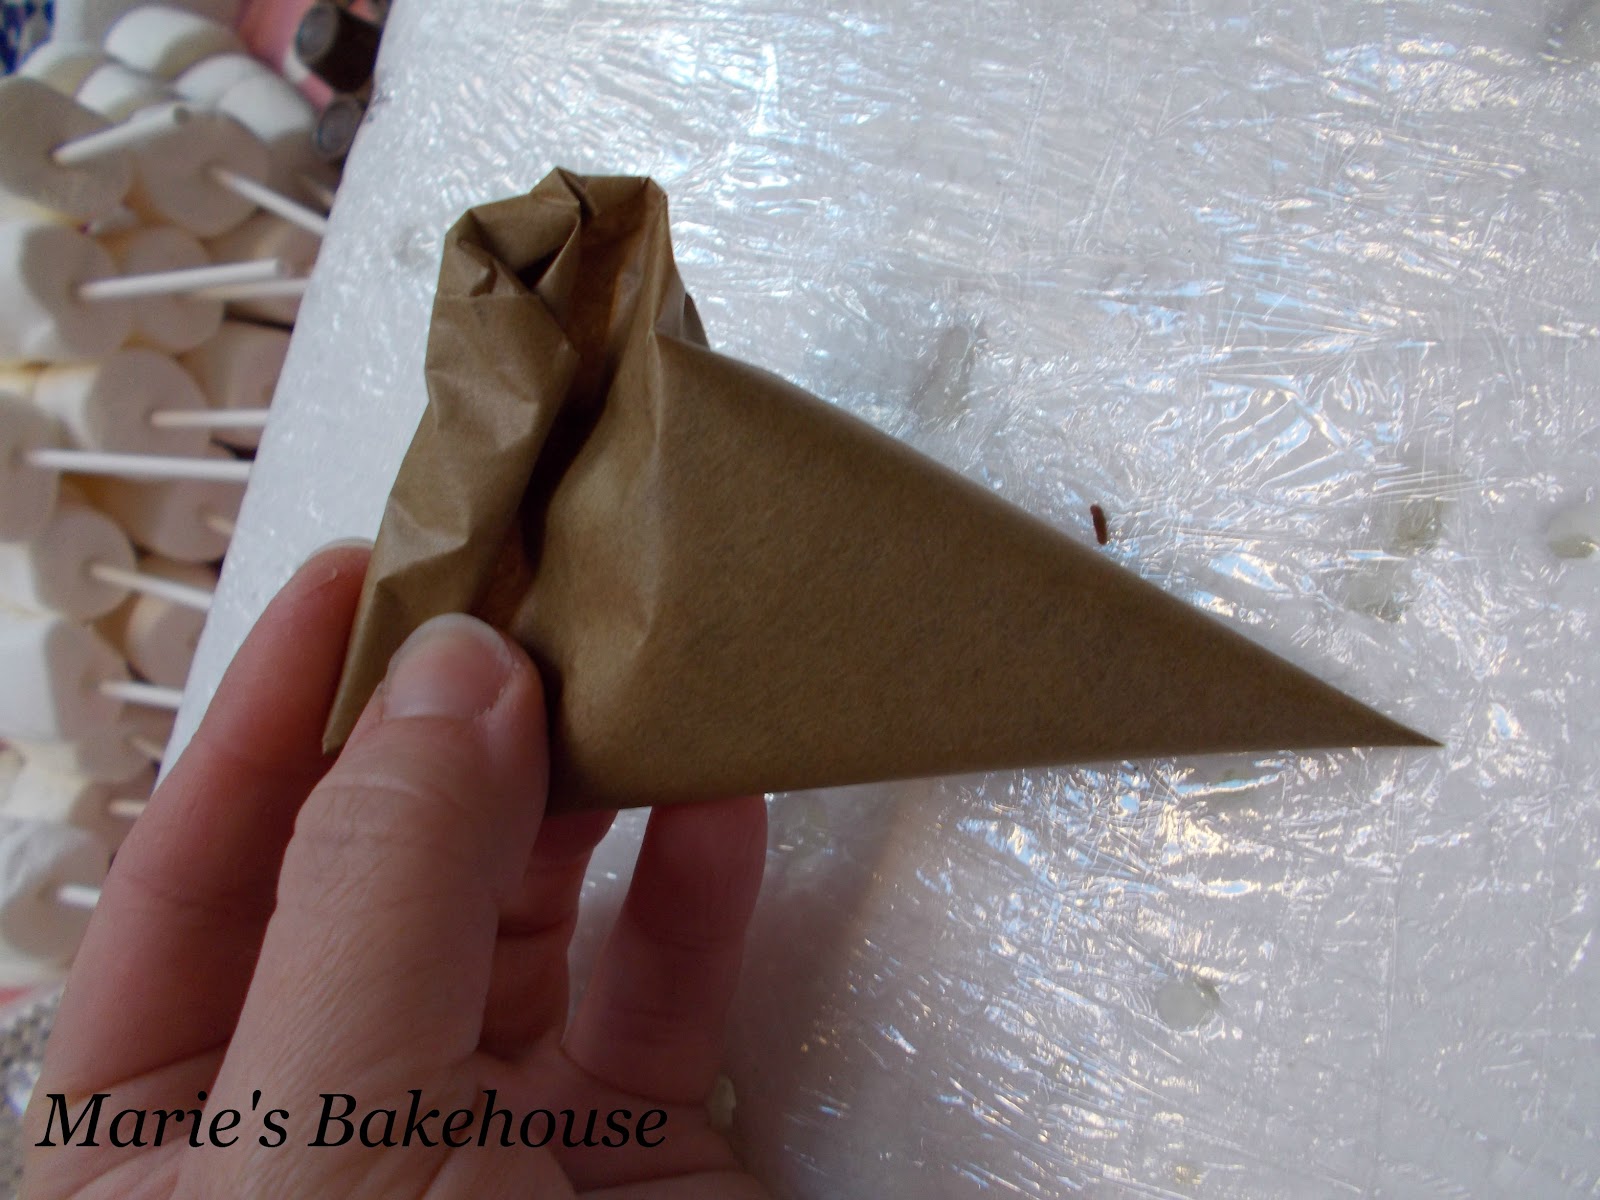
    For piping buttercream, I'd always choose a plastic throw away bag, but for piping chocolate, candy melts or royal icing, I like to use a paper bag.  And this is how you make one.....
     
     
    1. Cut a square of baking paper or greaseproof paper, then cut it in half diagonally to make a triangle.  Put the triangle on the table, with the longest side at the top.
     

    2. Take the top right hand corner and fold it down.....

    ........so the top corner meets the bottom corner.
     
     
    3. Repeat with the opposite corner.
     
     
    4. Then fold up the corners together, so the bag won't unwrap itself.
     
     
    5. Fill the bag about half full with your melted chocolate, candy melts or royal icing, then fold down the top of the bag so it doesn't escape out of the top.


    6. Now all you need to do is snip the end off the pointy part of the bag, and you are ready to pipe :0)

    www.mariesbakehouse.co.uk

    www.facebook.com/MariesBakehouse